Before we dive into exactly how to make DIY whipped Shea Butter recipes, let’s establish exactly what they are. Whipped Shea Butter is a type of body butter. Body butter is essentially a combination of cosmetic butter, (like Shea, Mango, or Cocoa butter) that has been mixed with carrier oils (like Sweet Almond, Argan, and Coconut oil). Whipped body butter has air introduced - using a mechanical mixer- to give it a lighter, fluffier texture. Because half of the ingredients are just air-whipped butter is profitable to market. Whipped shea butter are extremely popular because they are so beautifully light upon the skin
Shea Butter: A Nurturing Ally for Skin Health
Shea butter offers the skin a potent synergy of nourishment and protection, thanks to its naturally rich profile of fatty acids and vitamins. This botanical treasure doesn’t just sit on the surface; it hydrates deeply. It softens the skin and supports the skin’s innate ability to repair itself. Aromatherapists utilize it most for conditions where the skin benefits from resurfacing like eczema or psoriasis, or tending to scars and stretch marks.
She butter soothes irritation and redness and may also help reduce the visible signs of aging by encouraging collagen production and shielding the skin against environmental stressors such as pollution and UV exposure.
It offers benefits across a wide spectrum of skin types—from the driest and most sensitive to more balanced complexions seeking a deeper level of nourishment.
Key Benefits of Shea Butter for the Skin:
-
-
Deep Hydration and Moisture Support:
Rich in essential fatty acids, shea butter restores suppleness to dry, flaky skin, replenishing moisture where it’s needed most. -
Soothing for Irritation and Inflammation:
With its gentle, anti-inflammatory nature, shea butter helps to calm reactive skin, softening redness, swelling, and discomfort. -
Support for Scars and Stretch Marks:
Regular use can enhance skin elasticity and soften the appearance of scars and stretch marks, offering emotional as well as physical support through periods of change. -
Assists in Managing Skin Conditions:
Conditions such as eczema, psoriasis, and sunburn may find relief in the soothing embrace of shea butter, reinforcing the skin’s natural healing processes. -
Protection Against Environmental Stress:
Acting as a barrier against pollution and environmental aggressors, shea butter helps defend the skin’s integrity and vitality. -
Potential Anti-Aging Properties:
Naturally occurring antioxidants and their potential to stimulate collagen make shea butter a valuable ally for maintaining youthful, resilient skin over time. -
Versatile for Many Skin Types:
While exceptionally beneficial for dry and sensitive skin, shea butter’s gentle yet fortifying properties make it a nurturing choice for almost all skin types.
-
Raw or Unrefined Shea?
Raw Shea Butter, also known as unrefined Shea Butter, it is an all-round ingredient that nourishes and hydrates the skin. It protects the skin and helps support natural barrier function.
It pays to try to source an unrefined Shea Butter over-refined since refinement also destroys some of the active constituents. However, unrefined shea does have quite a strong distinctive scent. Refined shea has a softer aroma, but you will lose the vitamin content and some of the more skin-nourishing qualities. (Good job we have essential oils that can hide the smell and further add to the benefits really, isn't it?)
You can also use yellow Shea Butter which is refined and has gone through other processes to color it. It’s worth bearing in mind that the yellow can transfer to your clothes and linens.
If you are still not sure if Shea would be the best butter for your whipped body butter, why not weigh up more pros and cons by visiting Shea Butter vs Cocoa Butter: Which is Best for Your Skin & Hair?
Choosing Carrier Oils for Your DIY Whipped Shea Butter Recipes

If you have sensitive skin, irritated skin, or some kind of skin condition like acne, dermatitis, or eczema, you’ll want to choose your ingredients around properties that can soothe or relieve skin conditions.
Just as important as the cosmetic butter you choose, is your carrier oil. Thanks to components like triglycerides, essential fatty acids, vitamins, and antioxidants, each carrier oil has its own benefits and skills.
Jojoba carrier oil is closest to the skin’s secretion, sebum. This makes it an ideal choice for imbalances like the skin being too dry or too oily.
Sweet Almond is extremely nourishing for the skin and has the added benefit of having a long shelf life which will mean that your whipped shea butter will last longer.
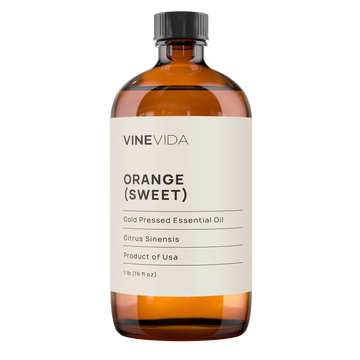
Coconut oil works well but it’s important that you choose a carrier oil that is liquid at room temperature. So if you live somewhere warm, Extra Virgin Coconut Oil could be great, but here in the UK, it is unsuitable because, since our climate is cooler, it goes solid.
You can also use combinations of carrier oils. I would always add Rosehip carrier oil. It is packed with antioxidants that protect against oxidative stress and fight free radicals.
Rosehip, Avocado, and Castor oil are all incredible choices, but the best practice would be to use them as a much smaller part of the overall formulation. I’d go with Avocado (40%) and Castor (40%) Rosehip (10%).
My favorites for making whipped Shea Butter would be, Jojoba, Sweet Almond, and Grapeseed, alongside a small proportion of Rosehip and Castor Oil for extra skin nourishing goodness.
For a deep dive into suitable carrier oils, check out Best Carrier Oils For Essential Oils: An Ultimate Guide To Learn Everything.
What Other Ingredients Can I Add?
You may wish to add a natural preservative of your choice to elongate your DIY whipped Shea Butter recipe’s shelf life and inhibit the growth of mold and bacteria.
Often, people like to add color to their butter and there are a variety of oil-based colors on the market to choose from. You can even add Mica powders to create a lustrous glow and shimmer on your skin. Shimmer Mica powders can work really well in summer-themed whipped Shea Butters with tropical scents and a golden luster to highlight your tan.
If it all feels a bit too oily or too greasy for you, you can add a tbsp of Arrowroot or Kaolin Clay to soak up some of the oil and leave it with a more velvety skin feel.
Avoid adding water-based ingredients, as they could separate without adding an emulsifier.
How To Make Whipped Shea Butter

Now I know some of you are searching for the best whipped Shea Butter recipes to use on your body. Look no further! This recipe is simple in terms of ingredients and how to make whipped butter.
Some of you are also looking for how to make whipped Shea Butter for faces. You will find a recipe for use on your face too, that is richer in carrier oils.
Simply follow the same method for the DIY whipped Shea Butter recipe and make the small tweaks you need to make it a completely bespoke product.
These recipes work better if you make a little more, so they will make about 8 oz each. Feel free to double up on ingredients and make a bigger batch for Body Butters. Face butter is better made in smaller amounts. Simply because you are most likely to use less within the span of the shelf life.
Just remember if you are adding your own essential oils and fragrance oils to stay safe and stick to the recommended IFRA maximum skin safety dilution rates in Category 5A.
You Will Need
Ideally, you will need a stand mixer or a handheld mixer to make homemade whipped butter. Yet, I always get asked how to whip Shea Butter without a mixer. If you are going to do it by hand, you need a good amount of elbow grease and an extremely stiff whisk. A standard hand whisk will not cope, it will not be strong enough to move through the body butter. An immersion blender will move through the body butter but won’t introduce the necessary amount of air that you get with a mixer.
-
-
Stand or hand mixer
-
Double boiler
-
Heat protective mat
-
Stainless steel spoon
-
Large mixing bowl (that will fit in your fridge)
-
Jar funnel
-
Silicone spatula
-
Wide-mouth jars with an airtight lid
-
Oil and waterproof labels
-
How To Make Whipped Shea Butter For Skin Care

Try this super simple DIY whipped Shea Butter recipe for use on the body. It’s a great recipe to start making your natural beauty products at home that are great for skin and hair. Yes, you can use this as a masque for your hair too.
It’s very rich in Shea Butter and will hydrate, nourish, and protect your skin beautifully and act as an effective moisturizer.
Remember you can choose any of the suggested essential oil and/or fragrance oils blends that you wish.
It is worth having an extra 0.25 Oz (7g) of extra Coconut MCT carrier oil, in case a softer texture is needed. As well as a tbsp of either Arrowroot Powder or Kaolin Clay to soak up any greasy skin feel. However, with the Coconut MCT, you don’t tend to get the same greasy feel that you might with other carrier oils.
You can easily modify this recipe to suit your individual needs, swap out carrier oils, and try adding another butter for example.
Ingredients:
-
-
5 Oz of Unrefined Shea Butter (Butyrospermum parkii)
-
2 Oz Coconut MCT carrier oil (Cocos nucifera)
-
0.5 Oz Rosehip Carrier oil (Rosa Canina)
-
Essential oil/fragrance oil blend of choice.
-
Optional Ingredients:
-
-
Natural preservative of choice - follow the manufacturer's instructions
-
Arrowroot Powder or Kaolin Clay
-
Natural colorants and micas
-
Safety:
-
-
See the individual safety advice on your chosen essential oil blends
-
Always do a 24-48 hour patch test
-
Do not use if allergic to nuts
-
Method:
Please See Below
How To Make Whipped Shea Butter For Face Care

This is a sumptuous DIY whipped Shea Butter recipe that you can use on your face. It’s a great recipe, which is just a combination of luscious liquid carrier oils and butter. You don't need a whole list of weird and wonderful ingredients to make great whipped Shea Butter for faces.
You will notice that I have added Mango butter, which is a hard butter, compared to Shea butter which is classed as a soft butter. It will give you a finer texture for use on your delicate facial skin.
I have also used Jojoba oil in conjunction with Coconut MCT and Rosehip oil, to make it suitable for most skin types. By all means, feel free to try sweet almond oil, apricot kernel oil, or even add a dab of antioxidant-rich vitamin E. However, leave the sunflower oil on the kitchen counter for this project.
Don’t forget, a few drops of essential oils can be added for their amazing active qualities. 19 Best Essential Oils for Glowing Skin.
Ingredients:
-
-
3 Oz of Unrefined Shea Butter (Butyrospermum parkii)
-
2 Oz of Mango Butter (Mangifera indica)
-
1 Oz Coconut MCT carrier oil (Cocos nucifera)
-
1 Oz of Jojoba carrier oil (Simmondsia chinensis)
-
0.5 Oz Rosehip carrier oil (Rosa Canina)
-
Essential oil/fragrance oil blend of choice.
-
Optional Ingredients:
-
-
Extra 0.25 Oz (7g) of extra Jojoba carrier oil, in case a softer texture is needed
-
Natural preservative of choice - follow the manufacturer's instructions
-
Arrowroot Powder or Kaolin Clay
-
Natural colorants and micas
-
Safety:
-
-
See the individual safety advice on your chosen essential oil blends
-
Always do a 24-48 hour patch test
-
Do not use if allergic to nuts
-
Method For BOTH Whipped Shea Butter Recipes
Melting the Shea Butter
-
-
Remember that Shea Butter is soft butter compared to Mango Butter, which is a hard butter. This means mango butter will take a little longer to melt, so always put it into your double boiler first.
-
Pre-warm your double boiler over low to medium heat, low and slow is the way to go. The less you can heat your oils and butter, the better.
-
While you are waiting for the double boiler to warm up, weigh the Shea Butter and all your other ingredients and have them ready to hand.
-
If you are using it, place the Mango butter into the double boiler first and when that is half melted add the Shea Butter in the double boiler too. You can stir to help melt the Shea Butter and any additional butters.
-
Cooling The Shea Butter Down
-
-
Once melted, immediately remove it from the heat separate the pan from the water below, and set it on a protective heat mat. Leave to cool for a few moments.
-
Add the Coconut MCT carrier oil and if using, the Jojoba oil and stir well. However, don’t add the Rosehip yet, as the heat can affect its wondrous qualities. You can use the Rosehip to dilute down your fragrance oil and essential oils, ready to add shortly.
-
Pour the oil and butter mix into a large mixing bowl and place the bowl in the fridge for about 20-40 minutes.
-
The sweet spot you are looking for is for it to be set up, but not so solid that you cannot do anything with it! As soon as it hits this point, either decant it into your stand mixer bowl using a silicone spatula or mix it directly with a hand mixer in this bowl. A folded tea towel set under the bowl helps it to stop slipping.
-
Whipping The Shea Butter
-
-
Now is the time to add your Rosehip carrier oil with your diluted essential oils and fragrance oils blend. Give this a good stir before you start your mixer to stop it from splashing out. (It’s a good time to add any preservatives too).
-
Then set your mixer on whip the butter and make whipped Shea Butter like no other!
-
You will need to whip it for longer than you think, which is why it is so difficult to do by hand without a mixer of some sort, to introduce the air. You are looking for a light and fluffy texture.
-
This is the point now to test your skin feel and consistency. If you want a less greasy skin feel add some Arrowroot or Kaolin and mix in thoroughly. If you want a softer butter instead then add that extra portion of carrier oil.
-
Also, add any colorant now to your homemade body butter formulations.
-
Jarring and Labeling The DIY Whipped Shea Butter Recipe
-
-
Make sure your whipped Shea Butter is fully cooled before you decant it into a wide-mouth jar with a jar funnel and a silicone spatula.
-
Clean the rim meticulously to discourage the formation of any mold or bacteria and add the lid.
-
Label clearly, listing all ingredients and essential oils for obvious safety reasons.
-
Add a production date and a 3-6 month expiry date, longer if you used a preservative.
-
How To Use And Store DIY Whipped Shea Butter Recipes
Now you have made your own whipped body butter, it pays to know how to use and store it for the best results for your labor.
Using Your DIY Whipped Shea Butter Recipes
Whipped Shea Butter is soft, light, and fluffy and is truly unctuous and gorgeous on your skin and it is just tempting to start slathering it on. Hold your horses though, and always do a 24-48 hour patch test, especially if any of the ingredients are new to you.
Once you are good to go, put on your skin, the body butter melts into it and leaves your skin feeling wonderfully velvety and beautifully soft, hydrated, and nourished.
Work the DIY whipped Shea Butter recipe into your skin, you don’t need much to go a long way. Work in long upward motions on your body towards your heart. On your face work in small upward circular motions.
Any form of massaging this whipped body butter will stimulate your circulation. A boost in circulation can help with regenerating skin cells and improving skin tone and elasticity. All of which improve the appearance of your skin.
Once you have made this body butter, you will see amazing results and skin glowing with health and vitality. You will have little reason to use anything else.
If you have skin inflammation and irritated skin, try a few drops of essential oils to support your skin’s needs. Find some ideas here - Essential Oils for Itchy Skin: Soothing Recipe & Remedies.
If you use a lot of body butter, just be mindful of overloading your skin. Whipped Body Butter is so rich, so they are best used 3-4 times a week, rather than for daily use.
Essential Oils For DIY Whipped Shea Butter Recipes
Given you are now getting into your stride in the process of how to make DIY whipped Shea Butter recipes, we can look at more specific essential oils to create different effects for your skin.
Florals Blend for Dry and Sensitive Skin

If you are looking for a DIY whipped Shea Butter recipe to address dry and/or sensitive skin try this wonderful combination of Rose Geranium, Lavender, and Roman Chamomile essential oils.
-
-
Rose Geranium constituents cool and soothe the skin and bring hydration
-
Lavender’s properties calm, soothe, and can help relieve skin irritations
-
Roman Chamomile has anti-inflammatory and skin-soothing actions.
-
To 4 Oz of DIY whipped Shea Butter recipe base add the following:
-
-
40 drops of Rose Geranium essential oil (Pelargonium Roseum X Asperum)
-
20 drops of Lavender essential oil (Lavandula angustifolia)
-
20 drops of Roman Chamomile essential oil (Anthemis nobilis L.)
-
Safety:
-
-
Do not use it in the first 16 weeks of pregnancy
-
Resinous Glory for Mature Skin

This DIY whipped Shea Butter recipe is a dream for more mature skin that needs extra nourishment and care. Laced with resinous Frankincense and earthy Patchouli, it has a distinct and seductive aroma. By all means, add some floral essential oil notes for a more feminine aroma if you wish. Make it deep and rich with Dark Patchouli if you love the more intense aroma.
-
-
Frankincense’s properties help rejuvenate the skin and encourage the production of new skin cells for a smoother, more refined skin tone and appearance.
-
Patchouli helps to carry all the wonderful constituents from the cosmetic butter and carrier oil deep into the layers of the skin, like essential fatty acids and vitamins.
-
To 4 Oz of DIY whipped Shea Butter recipe base add the following:
-
-
60 drops of Frankincense essential oil (Boswellia serrata)
-
30 drops of Patchouli essential oil (Pogostemon cablin)
-
Safety:
-
-
Do not use it in the first 16 weeks of pregnancy
-
Soothing Relief for Irritated Skin

Are you scratching at yourself because you are itchy and tetchy along with it? I know how you feel! I’ve blended these essential oils to create a DIY whipped Shea Butter recipe that will bring soothing, calming relief to itchy skin conditions and your mood.
-
-
I’ve used German Chamomile as the blue oil is created by the pain-relieving constituents of azulene. It makes for a pretty sky-blue whipped Shea Butter and I promise you won’t end up looking like a Smurf!
-
Lavender brings her floral aroma and soothing energetics to mind and body.
-
Peru Balsam is a lovely almost honeyed oil to use for soothing chapped, broken, or irritated skin. That said, please patch it individually first, as it may not agree with everyone, read why here. If it disagrees with you, swap it out for Patchouli.
-
To 4 Oz of DIY whipped Shea Butter recipe base add the following:
-
-
20 drops of German Chamomile essential oil (Matricaria chamomilla L.)
-
20 drops of Lavender essential oil (Lavandula angustifolia)
-
8 drops of Peru Balsam essential oil (Myroxylon Pereirae)
-
Safety:
-
-
Do not use it in the first 16 weeks of pregnancy
-
Wild, Decadent, and Completely Indulgent

I always think that whipped Shea Butter is unctuous, and decadent and should be steeped with all things luxurious. There is little that feels better than cosseting your skin in a nourishing veil of whipped butter laced with stunningly beautiful essential oils. I’m sorry, but I spared no expense on this one. It’s unashamedly indulgent and encourages you to live a little and treat yourself.
-
-
Jasmine lifts your spirits and has wonderful properties that encourage skin healing. It’s an intoxicating and heady aphrodisiac too.
-
Neroli is basically Orange Blossom and this too will lift your mood and promote relaxation. It has anti-inflammatory qualities to soothe inflamed skin.
-
I have used Amyris here instead of Sandalwood, but if you have sustainably sourced Sandalwood, by all means, use that. Amyris brings its soft, aphrodisiac energy to your DIY whipped Shea Butter recipe.
-
To 4 Oz of DIY whipped Shea Butter recipe base add the following:
-
-
12 drops of Jasmine essential oil (Jasminum grandiflorum)
-
20 drops of Neroli essential oil (Citrus aurantium)
-
20 drops of Amyris essential oil (Amyris Balsamifera)
-
Safety:
-
-
Do not use it in the first 37 weeks of pregnancy.
-
Fragrance Oils For for DIY Whipped Shea Butter Recipes
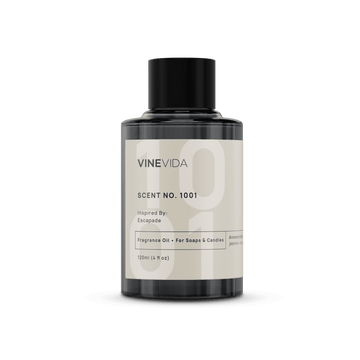
You can add the whole range of VINEVIDA Soaps & Candles fragrance oils to your DIY whipped Shea Butter recipes and enjoy their intense aromas. Just not all at once! There are so many wonderful choices available to you.
However, our Diffuser fragrance oils are just for nebulizing and Cold Air Diffusers (CAD), please do not use them in your DIY whipped Shea Butter recipes.
May is all about blooming flowers and starts to herald the journey transitioning from spring to summer. We are going to focus on how to blend these blooming gorgeous floral fragrance oils to create a variety of different effects. Try these sumptuous floral fragrance oil blends in your DIY whipped Shea Butter recipes.
Whipped Body Butter falls into IFRA Category 5A, you will need to check the maximum safety dilution rates of your fragrance oils in this category for your DIY whipped Shea Butter recipes. Don’t forget you can use the VINEVIDA calculator to help you and if you get stuck, pop over to How To Find Safety Information On The VINEVIDA Website.
However, in these floral blends, I have worked out all the safety data for your DIY whipped Shea Butter recipes. Just don’t use any more than stated.
Floral Fantasia Blend

This is a sublime layer cake of beautiful flowers. Softly scented layers upon layers of floral complexity, intoxicating Jasmine meets gentle Violets, and hypnotic Tuberose gets softened with Lavender. Then it is beautifully balanced with rich woods, musk, and a ribbon of Vanilla and Orris Root. Perfect for a celebration of flowers in your DIY whipped Shea Butter recipes.
Zingy and Invigorating Blend

If you want brighter, lighter DIY whipped Shea Butter recipes that have a bit of zing to them, choose fragrance oils with plenty of citrus and green notes. I think you will like the sophisticated citrus elegance of NO. 3516 alongside the softer and more refined Neroli aroma of NO. 3115.
Please note NO. 3516 has a very low safety dilution rate of just 1.49% so don’t be tempted to add more.
Green and Refreshing Blend

Green blends for your DIY whipped Shea Butter recipes can sometimes lack the refined elegance you need for a truly indulgent and sophisticated body butter. You do need to blend mindfully but don’t be afraid to try rain, marine, and oceanic aromas with refreshing notes of Lemongrass, Lime, and Bergamot.
I think you will like the refined floral greenery nature of NO. 3512 with just a dash of refreshingly zingy NO. 48.
Dark and Mysterious Blend

I have to confess I do love a dark and mysterious blend for my DIY whipped Shea Butter recipes. I like to create the unexpected and so does Tom Ford, so take a look at our new Tom Ford additions because some of them are perfect for this type of blend.
I think you will love the spicy citrus and strong Jasmine heart of NO. 3129 balanced with the musky woods of NO. 74.
P.S. I used this very blend in perfumer’s alcohol to make a bespoke Eau De Parfum and it worked beautifully. It’s something special. Give it a whirl for something moody and brooding.
Rich, Comforting, and Cosseting Blend

I know lots of you LOVE DIY whipped Shea Butter recipes that have Gourmand or food-based aromas. Notes of Vanilla can instill in us feelings of safety and comfort. If we balance these with Cashmere aromas and robust floral hearts we can create bespoke aromas to die for.
I’ve gone for the Orchid heart of NO. 2205 that is shot through with ribbons of nutty Praline, toasted Coconut, and smooth Vanilla. I have paired it with the exceptional Vanilla and Cacao notes of NO. 4009.
For inspiration on how to balance comforting gourmand notes look at the fragrance notes of the Sol De Janeiro range. They are masters of it!
Storing Your DIY Whipped Shea Butter
It helps to store your whipped body butter in a dark place at a cool and ambient temperature. Preferably, not your hot and steamy bathroom. It will also help to scoop your body butter out with a Gua Sha tool or even just a bamboo spoon. It stops the introduction of bacteria, dirt, and oils from your fingers into the cream, helping it last longer.
If your whipped Shea Butter gets too hard it is worth knowing how to keep whipped Shea Butter from hardening. Cool temperatures will cause the butter to harden, especially if you keep it in the fridge. Try storing it somewhere a little warmer. Time can also cause the whip to settle and you can simply re-whip it to re-introduce a light and fluffy texture.
Because whipped Shea Butter is made from natural ingredients it will only have a certain shelf life. If it starts to get an odor a bit like an old chip pan, it is a sign that the oils may have turned rancid and gone off. You should discard it and make a new batch.
The Final Word
If you ever thought about making body butter, I hope these DIY whipped Shea Butter recipes encourage you to give it a go. Now you know that all you need to make a DIY body butter is some liquid carrier oils and butter. You can enhance them with essential oils, fragrance oils, colors, and micas if you wish.
You can make these whipped body butter formulations your own by adding essential oils. Design your whipped butter for your skin’s needs and choose from the following essential blends:
-
-
Florals Blend for Dry and Sensitive Skin
-
Resinous Glory for Mature Skin
-
Soothing Relief for Irritated Skin
-
Wild, Decadent, and Completely Indulgent
-
Alternatively, you can just add the lusciously intense floral fragrance oils for a light and fluffy, buttery scentsation. Experiment with:
-
-
Floral Fantasia Blend
-
Zingy and Invigorating Blend
-
Green and Refreshing Blend
-
Dark and Mysterious Blend
-
Rich, Comforting, and Cosseting Blend
-
You can try two different recipes, Whipped Shea Butter For Skin, is designed for use on the body and to bring much-needed nourishment to dry skin. We also have a refined Whipped Shea Butter For Face, which is designed for facial use with additional Jojoba carrier oil, to suit all skin types.
All you need is two simple ingredients to make your very own DIY whipped Shea Butter recipes. What are you waiting for?