Commercial soaps that you commonly see on the market often include harmful ingredients such as parabens, phthalates, and even formaldehyde. These hide under their chemical names, and soap purchasers remain unaware. The solution to this is to buy transparently natural soaps, or try your hand at making your own!
In our previous blog post, we discussed the five different methods of making soap. Now, we are going to go more in-depth on each one of these, and walk you through the exact process of how to make soap with them!
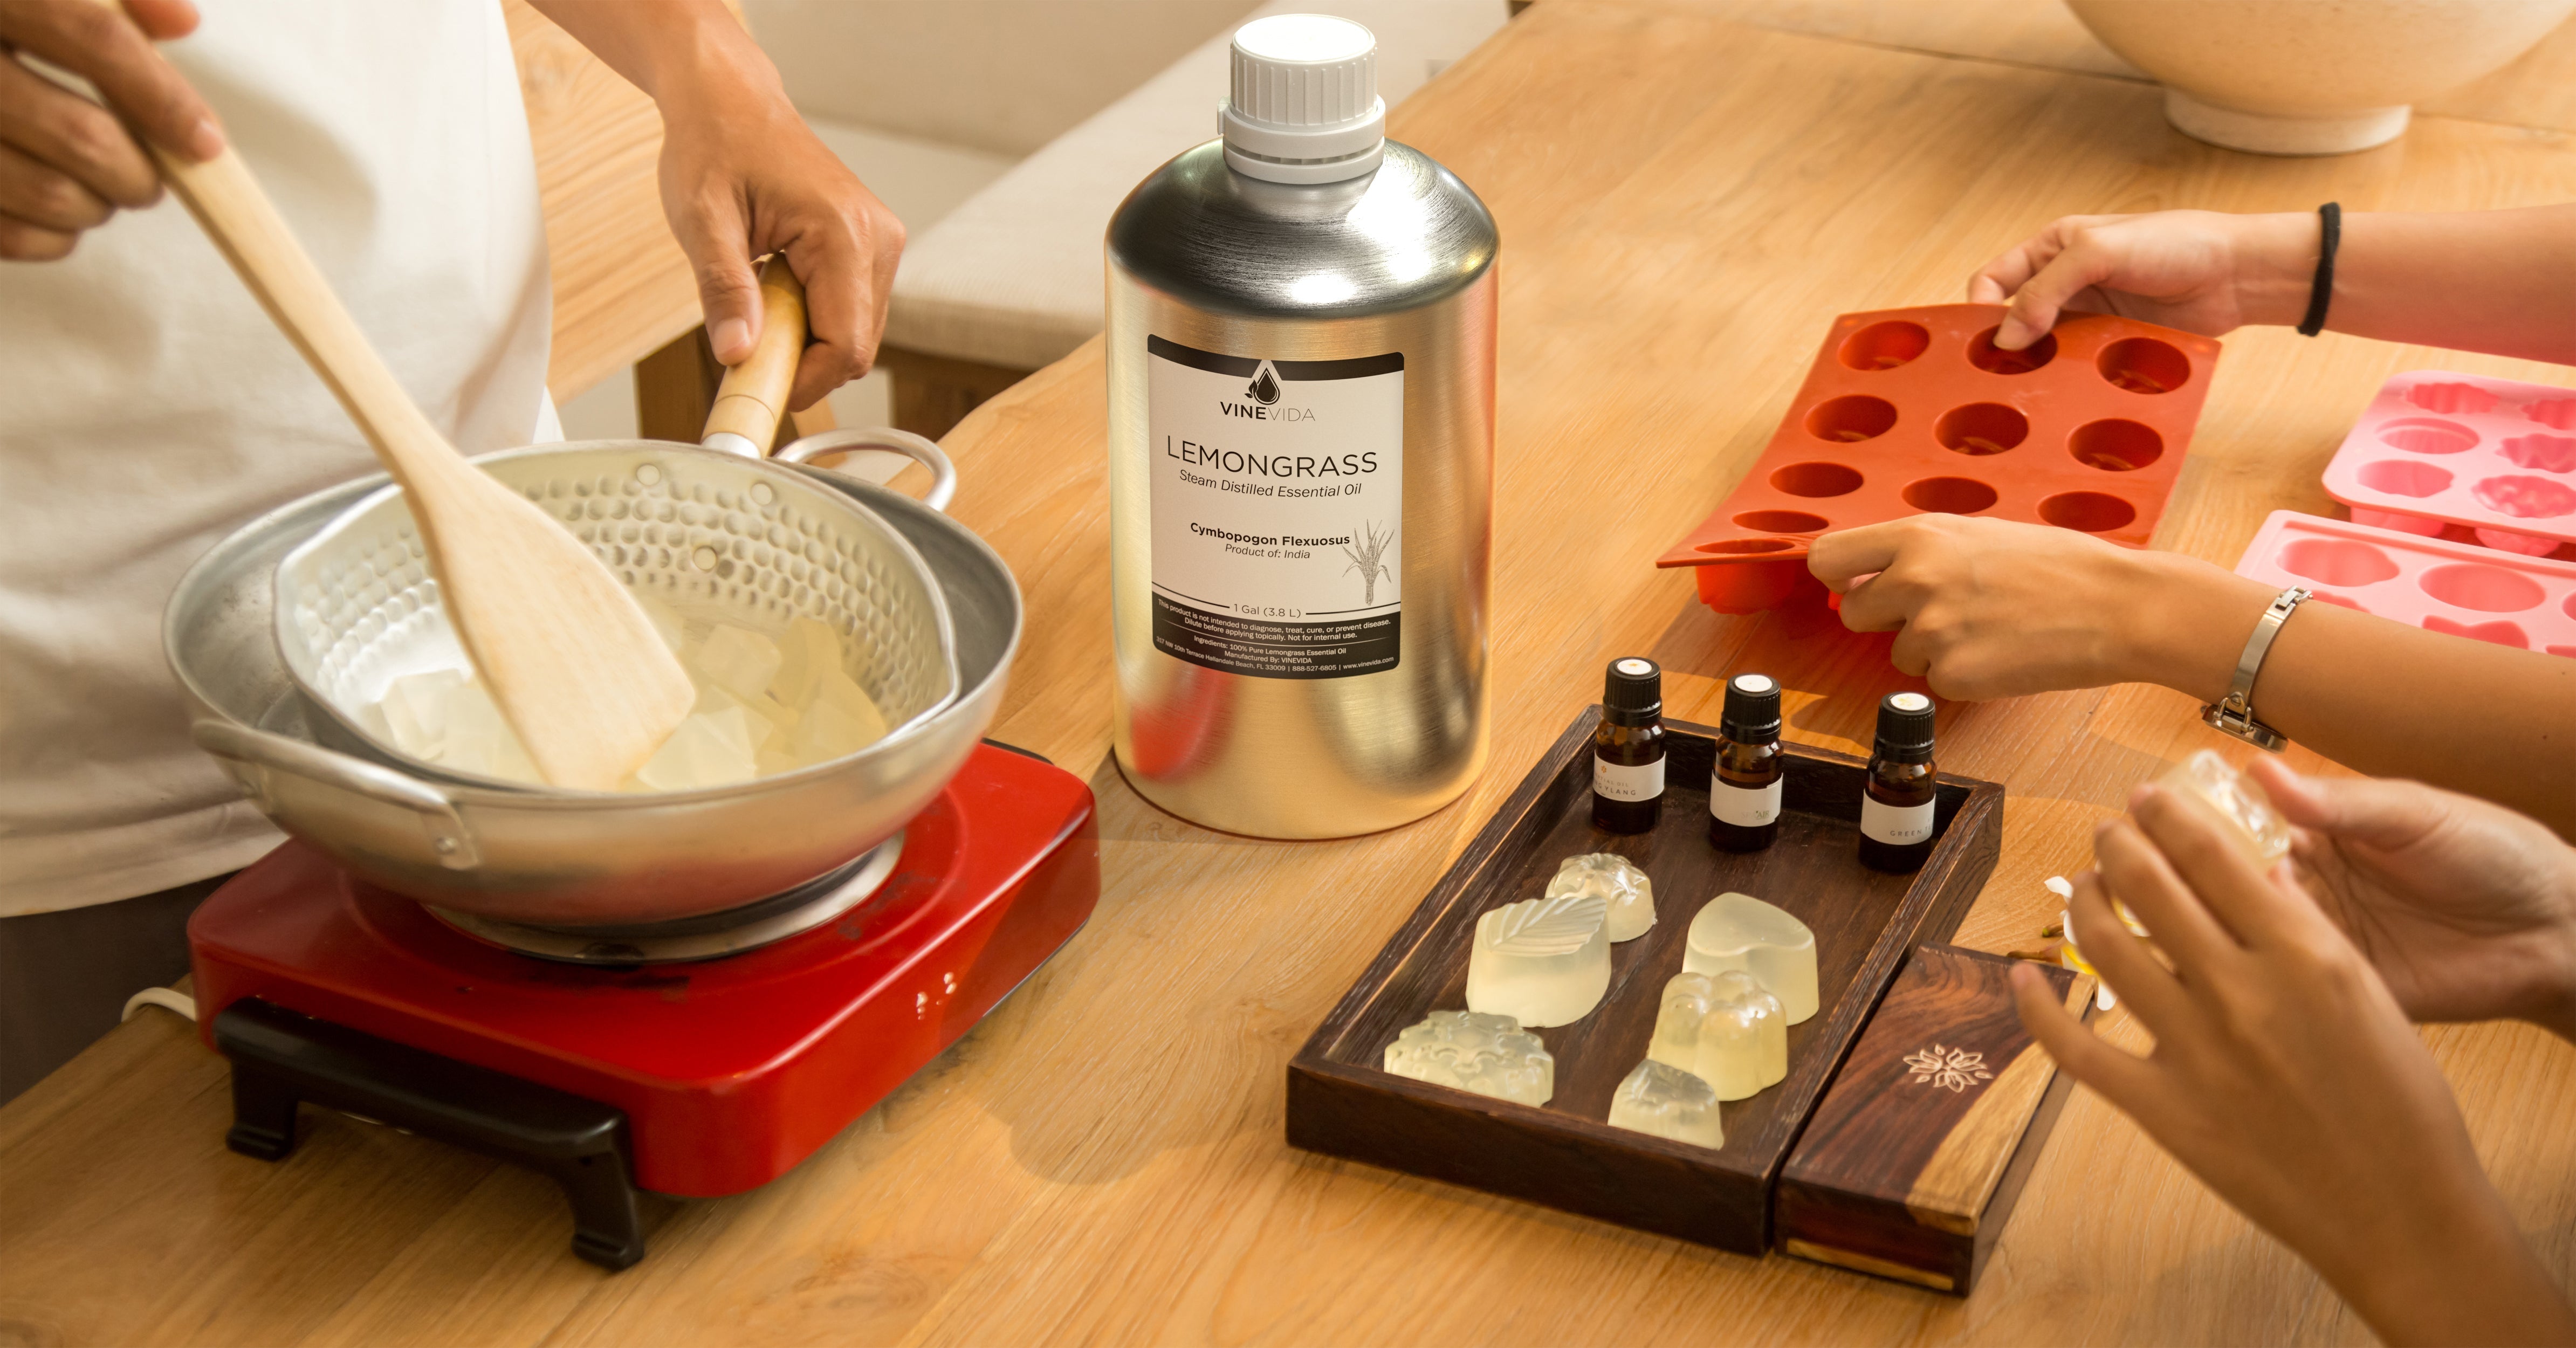
Melt-and-Pour Soap Making
For beginners, this is likely the first method you will want to try. It’s the easiest and doesn’t require the use of chemicals or safety equipment!
Materials Needed:
-
- Either a double boiler or a microwave
- Measuring cup (glass)
- Soap Base (purchased online or from your local craft store)
- Soap Molds
- Spoon
- Items to customize your soap (coloring agent, essential oils, etc. *optional)
Method:
-
- Chop or grate your soap base into small pieces, and melt using either a double boiler or the glass measuring cup and microwave. Be careful to keep a close eye on the soap, ensuring that it doesn’t overheat!
- When the soap is completely melted, add in color, essential oils, or fragrance, and any other items you might wish to include. (Oatmeal, dried flowers, and herbs, etc.)
- Pour soap into molds and let cool completely. (This usually takes at least an hour.)
- Pop soap out of molds and it’s ready to roll! Any soap that you will not be immediately using should be tightly wrapped and stored in a dry, cool location.
Rebatched Soap Making Method
The next soap-making method on our list is the rebatch method. This method follows the melt-and-pour method in terms of difficulty and involves melting down and combining bars of soap to come up with new creations.
Materials:
-
- Bars or pieces of existing soap
- Grater
- Double boiler (alternatively, you can use two pots to create your own)
- Spoon and bowl (make sure there are ones you don’t mind giving up to the craft of soap making!)
- Any additional add-ins, such as essential oils, color, and herbs
- Soap Molds
Method:
-
- Grate all the existing soap so that it is in tiny pieces
- Melt in a double boiler
- Pour the melted soap into your bowl and add in any additional aesthetics, making sure to stir them well to combine
- Pour into molds while still hot
- If you are using melt-and-pour or commercial soaps, you can use them as soon as they set, but if you’re repurposing bars of soap you made through the cold process method, then they will need to cure for a few days in a cool, dark space.
Cold Process Soap Making
Though cold process soap making is the most common method, it is significantly more difficult than the previous two. Cold processing means making your soap from scratch, which involves using lye, a dangerous chemical. Always make sure you are following a recipe that you know you can trust, and use proper safety equipment. This is a general overview of how the process works, but you will need a reputable recipe to ensure you are using the correct measurements.
Materials:
-
- Eye protection, gloves, mask, and protective clothing (you should make sure all your skin is covered, and that you are wearing an outer layer that is waterproof or will prevent lye from soaking into the fabric. If this happens, it can potentially come into contact with your skin!)
- Metal pot and some sort of stick you can use for stirring (similar to those you would use while painting)
- Cold process soap recipe (a reputable one!)
- Digital scale
- Lye
- Thermometer
- Some type of fat or oil
- Water
- Customizations for your soap (essential oils, colorants, herbs, etc.)
- Soap mold
- Drop cloth or an old towel or blanket
Method:
-
- Don proper safety gear!
- Using the amounts given in your recipe, you will first measure out the lye and water.
- Add lye to water. NEVER ADD WATER TO LYE! Allow mixture to cool to your recipe’s specified temperature
- Mix any fragrances into the oil or fat you have chosen to use.
- Weigh oil/fat, and heat to the required temperature. (This is usually the same as the lye temperature.)
- Add the lye to the oil/fat mixture, and continuously stir until it begins to thicken. You can also use a stick blender for this step. This can sometimes take up to an hour, which is why using a blender in short stints can help save time and energy.
- Pour the mixture into your soap mold, covering and surrounding it with old towels to provide insulation. Allow your soaps to sit for a few days and then take them out, allowing them to finish curing in the open air for the recommended time.
Hot Process Soap Making
Hot process soap making is very similar to the cold process, except that instead of the long curing process it is cooked.
Materials:
-
- Protective gear (see cold process method for more details)
- Hot process soap recipe (from a reputable source!)
- Crock pot
- Glass measuring cup (some metals will react with lye!)
- Lye
- Oil/fat
- Water
- Thermometer
- Coloring agent, fragrance, and other desired additions
- Soap molds
Methods:
-
- Put on all necessary protective wear
- Measure out all ingredients according to your recipe
- Add your solid fats/oils to the crock pot, letting them melt
- Add lye to the water (NEVER the other way around), stirring constantly to keep it well combined. Stir slowly (avoiding any splashes) until the lye is dissolved. Do your best to avoid breathing in any fumes
- If your solid fats are melted, you can now add any liquid fats to the crockpot
- When your fats reach the temperature your recipe requires (this should never be above 180°), you can then add in your lye solution. Use your stick (or stick blender) as a tool to help prevent splashing by resting it against the side of the pot, and pouring the lye down the stick. Stir to mix, and then either continue stirring or use your stick blender to combine. Combine as required in your recipe.
- Cook according to the recipe, occasionally stirring and scraping the sides.
- When your soap begins to look thick and waxy, turn off the heat
- Let the mixture cool slightly before adding in fragrances and coloring agents
- Quickly use a spatula to get your wax mixture into the molds
- Let the molds set in a dark, cool space for 24 hours or longer
Liquid Soap
If you prefer liquid soap, you are in luck! Liquid soap is very easy to make, and it makes a great gift as well.
Materials:
-
- Bar soap
- Grater
- Water
- Liquid glycerine
- Large pot, and a designated soap stirring spoon
- A hand mixer or a stick blender
- Heat-proof container
- Any additives like fragrances or coloring agents (essential oils, spices, honey, etc.)
Methods:
-
- Grate up your bar of soap, adding it to the pot
- Add in 4 cups of water
- Add in .75 tbsp of liquid glycerine
- Heat the mixture until everything dissolves, stirring constantly
- Pour the mixture into a heat-proof container, and add any fragrance or color
- Allow mixture to completely cool (overnight is best)
- Use a mixer to blend the cooled soap. Allow it to settle, then put it in the desired containers
Conclusion
Whichever soap-making method you choose to use, the most important part is to be sure to use a reputable recipe from a source you can trust. This is particularly crucial if using chemicals such as lye. Try experimenting with different essential oils for soaps, to create new scents and blends. Making soap at home is a great way to avoid harmful chemicals, AND have fun while doing it! Go on, get creative!